
Dilemmas! Hooking “Bear in the Woods”
Updated: 2 days ago

Dear Friends, This edition of Noodlings concerns “Bear in the Woods” and the dilemmas involved in hooking it. Dilemmas, it turns out, are little gifts that help us grow in our art. Here's the story...
Along with the friendly hookers at Central Iowa Rug Artists (CIRA), I had a once-in-a-long-time opportunity to take a workshop with… drum roll, please… Gail DuFresne! Gail wrote a book on Geometric Rugs, and I have always loved her realistic creatures on a geometric background. I signed up right away for this September 2025 four-day workshop.

Then, the task was to draw my pattern with my own creature on a geometric background. But which creature? At our tiny cabin on a lake in Minnesota, our neighbors have been spying black bears for the first time, pushed south by the wildfires in Canada. They’ve sent me photos of bears in their yards and even one in our yard! I had my creature.
Now, what would my geometric background be like? The woods of Ottertail County, Minnesota, are full of birches, maples, and pine trees. The conical shape of the pine won out. I printed Christmas tree templates in several sizes.

I drew my pattern. Gail graciously gave me a thumbs-up on it and gave me her blessing to get going on this rug before the workshop. “Sure,” she wrote. “Go ahead and hook the bear beforehand.” I’ve hooked many impressionistic wildlife portraits and felt fine about the bear. It was the geometric background that would have to wait until the workshop. So I hooked away on my colorful bear and really looked forward to Gail’s help with my geo pine forest.
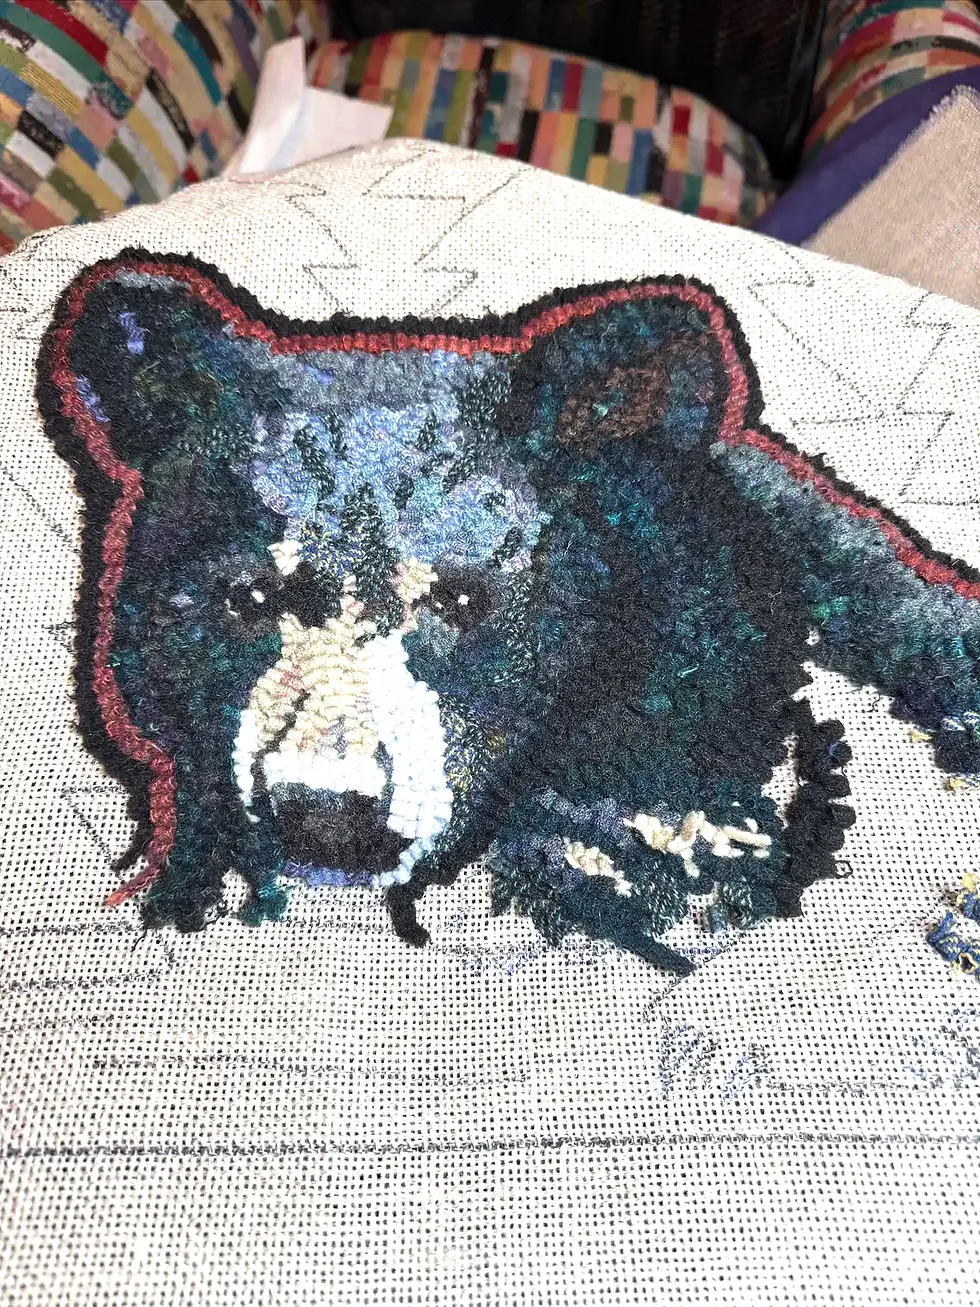
Then, things took an unexpected turn. My sweet mother went into the hospital, and I was suddenly not going to make the workshop after all. I contacted Gail and withdrew, disappointed. But like most set-backs, this turned out to have a silver lining.
Without a teacher, I would have to face my dilemmas myself and work at this background through trial-and-error.
You know, sometimes we see a finished rug, and we think that the hooker HAD no dilemmas. But we all have them, and here, I'll share some of the wrong turns and corrections I made with Bear in the Woods.

Methods for Hooking Trees
In the workshop, of course, I’d have asked Gail how SHE would have hooked the trees. At home in my studio, I had three ideas:
A. To hook them in parallel downward-diagonal lines that suggest the weight of the branches. Gail has some lovely rugs that use this method.
B. To hook them by contouring, working inward until I filled the space of the tree.
C. Or finally, after talking with my friend Anita White, I thought I might hook some of the smaller trees in a higgledy-piggledy fashion, after outlining the shape of the tree with a couple rows.
I experimented. For the larger trees in the foreground, I ended up including more detail and color variation, using my A-method (parallel lines) for the dark (right) side of each tree, and my B-method (contouring) for the lighter and brighter (left) side. And for ALL of the smaller trees, I used Anita’s method of outlining the shape with two rows and then filling with higgledy-piggledy hooking.
MORE Dilemmas
Beyond tree-hooking methods, I really didn’t think that this rug would pose too many dilemmas. Yet, I found myself deliberating at every turn…

Would I stay true to realistic tree colors? I’d always thought of the trees as mostly blues and greens, but when it came down to choosing colors, I veered into violets and even some pinks and oranges. The answer turned out to be NO, not necessarily realistic colors. My conifer colors could be anything within my palette—nothing to do with real trees.
In every case except one, I used the same wool on two smaller trees. There's one odd tree in the upper left, a pale green one, back row. That's the only time I used that pale green wool.

What would I use for my background wool, and should I use more than one? I had chosen a subtly-patterned as-is wool for the background. It has the softest blue, gray, and cream that hooked up in a misty-looking way, perfect for a pine forest. I also chose a couple blue grays in darker values, with the idea that the background would be lighter at the top (near the location of sun and sky) and it could grow darker as I hooked the middle and lower parts of the background. I can’t tell you how terrible and confusing this made my design! No photos survive. The tree shapes needed to be placed against a uniform background throughout the rug design. I pulled out and re-hooked parts of the background with my misty wool, top to bottom. Much clearer.
Should I outline the trees? At first, I didn’t use my misty background wool to outline overlapping trees. This, too, was an AHA moment. My geometric design just couldn’t be successful without that pale outline, that tiny bit of separation between elements, which also feels like a layer of snow on the trees in some places. Obviously, I fixed this throughout the design.

Could I create a light spot in the sky? I tried this several ways. I ended up taking an off-white 4-ply yarn and hooking with a 2-ply strand in a demilune shape at the top-center. I hooked two fine concentric circles around the solid center. The bright spot has a purple tree in front of it, but you can still make out its circular shape. This light half circle is subtle, and you could miss it, but for me this whitish glow helps to balance the very light muzzle of the bear.

Last, the bleeping border. At first, I was too casual about how I distributed color and value in the diagonal hit-or-miss border. The result was distracting, if not downright disorderly! While this hap-hazard hit-or-miss approach had worked on other rugs quite well, I needed an orderly border design for this one. Given the Northwoods theme, I decided to take inspiration from Pendleton blankets, and hooked a couple of warm bands across opposite corners. The rest of the border is hooked in blacks, grays, blues, greens, purples—all quite dark. These dark hit-or-miss strips show some variation and texture, but they read pretty solid and don’t pull the eye away from the center of the rug.
My biggest take-away from this project is this. When we hook a commercial pattern, or even when we adapt a photo (like I did with the bear portion of the rug), we don’t face so many dilemmas. We have an image to steer by, and our choices are limited. But when we branch out, creating our own design and trying something new, even if it seems pretty simple, we face MANY unanticipated dilemmas. And we have many opportunities to try and fail, try again, and best of all, to learn.
Thanks for reading my Noodlings! Wishing you lots of pretty loops!
Tammy


Comments